Showing posts with label recipes. Show all posts

Friday, November 20, 2015

Baby Food Making

First taste of baby food, carrots
When Sawyer was a baby, my mother and I got together every week and made his baby food. We would visit the farmer's market or produce section at the grocery store and experiment with all different types of food for him.

Now that Scout is old enough to try foods, we have started the tradition again. We have already made carrots and sweet potatoes...he has approved of both. My mom found small containers at Dollar General (4 for $1) since I had thrown all Sawyer's out. They are the perfect size.

To  help other Moms out there who might be going through this same stage, I have compiled my entire list of baby food recipes in this one blog, in order.

For us, it saved money but also was comforting to know exactly what we are feeding our boys.
Let me know if you have any questions!
Have fun!

Carrots
http://www.hamratime.com/2012/06/adventures-in-baby-food-making-carrots.html

Sweet Potatoes

Squash & Green Beans


Apples

Plums


Cherries


Chicken

Friday, October 23, 2015

Meal Delivery: Green Chef

A couple weeks ago I posted a blog reviewing the meal delivery services of HelloFresh and Blue Apron. We have tried another service, Green Chef. This was another one my friend Katie has tried and sent some free meals my way (free meal code is below if you are interested).

If you want to review what we though to HelloFresh, read my post here: http://www.hamratime.com/2015/08/meal-delivery-hellofresh.html
http://www.hamratime.com/2015/09/meal-delivery-blue-apron.html

Green Chef

use my code for 4 free meals: http://greenchef.com/invite/rn4w5

HOW IT WORKS: Same as the other companies I have reviewed except they are USDA Certified Organic with no synthetic pesticides, modified organisms, artificial ingredients, or GMOs/antibiotics plus eco-friendly packaging.

PRICING 
$10.49 per person per meal for 3 Vegetarian Recipes
$11.99 per person per meal for 3 Omnivore recipes (veggie, meat, seafood)
$13.49 per person per meal for 3 Carnivore recipes (meat and seafood)

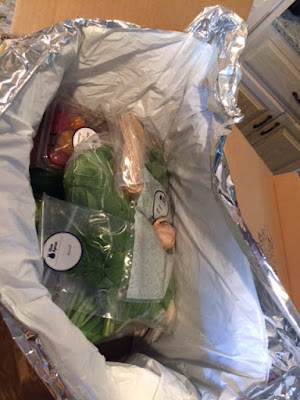
HOW IT ARRIVES: In a large box, all ingredients wrapped in a giant insulated bag with cold packs and instructions, color coded. They aren't individually wrapped per meal, but do color coded stickers on each ingredient that matches the instruction sheets.

_ _ _ _

OUR MEALS:

Ginger-steamed Cobia

with chard argue & scallion rice cakes


Ingredients (all organic): cobia fillets, aromatic vegetables, herbs, dried shiitake mushrooms, vegetable stock, celery, Swiss chard, sushi rice, sushi sauce, mirin
Cook time: 30 minutes


Verdict: We loved the scallion rice cakes, crispy and very tasty. I liked the fish but wasn't a huge fan of the ragu. Overall it was very good, can't wait to make the rice cakes again.

_ _ _ _

Molasses Chicken

with veggie fries & caramelized onion couscous

I forgot to take a picture, here is the one from their site
Ingredients (all organic): marinated chicken breasts, spiced orange-ginger sauce, rainbow carrots, green beans, honey-glaze, rosemary, parsley, pearl couscous, yellow onion, smoked salt

Cook time: 40 minutes


Verdict: Everything was very good. It was hard to get the chicken to cook thoroughly but not burn the outside because of the molasses marinade. It was still tasty but a little over crispy for my taste. The pearl couscous was delicious!

_ _ _ _

Pesto Grilled Cheese

with marinated artichoke salad & tomato jam


Ingredients: ciabatta, organic butter, organic mozzarella & Swiss cheese, organic arugula pesto, organic olives, organic grape tomatoes, organic garlic, organic balsamic brown sugar, marinated artichokes, organic sprouted lentils
Cook time: 15 minutes

Verdict: Definitely my favorite of all of them. The arugula pesto was amazing and I actually saved some to put on my sandwiches the rest of the week. The balsamic glaze on the tomato salad was super tasty! I will be making this again.
_ _ _ _ _

Finally Opinion: Very happy that they are Certified Organic on all ingredients compared to the other companies. I wasn't a huge fan of the color coding because the colors they sent were too close to tell (pink and red) when in the refrigerator. I actually got a couple ingredients mixed up. If they picked different colors I think it would work great.


Again...here are our PROs and CONs
My biggest PROS for using a delivery service:
  • It has prevented us from eating out, we have been having dinner at home almost every night.
  • Opened us up to trying new types of recipes I would have never thought of
  • taught me cooking techniques I usually shy away from (ex. cutting corn off the cob instead of buying frozen or canned corn)
  • And my favorite, I get 20-40 minutes of ME time to cook. It has been a huge de-stresser but still Sawyer likes to help with some recipes and that is still just as enjoyable.

And CONS:
I really don't have cons except maybe the choices of how many meals and for how many people. It would be nice to get one for 3 people and maybe just 2 times a week.

Thursday, September 3, 2015

Meal Delivery: Blue Apron

Last week I posted a blog reviewing the meal delivery services of HelloFresh. This last week we tried another service, Blue Apron. Thanks to my friend Katie for sharing the company with us and sending us free meals to try (message me if you want some free meals and as I earn them I will send them out). They have almost identical concepts but just a few differences in the details.

If you want to review what we though to HelloFresh, read my post here: http://www.hamratime.com/2015/08/meal-delivery-hellofresh.html

Blue Apron

www.blueapron.com

HOW IT WORKS: Same as HelloFresh except for price and how you receive your meals. It still comes in a big box with cold packs but they aren't individually wrapped per meal, just one big box of ingredients (with labels when needed). You get little bags called "knick knacks" that have additional ingredients that aren't the meats veggies or fruits (like butter, sauces, garlic, etc.) You pick your plan type (2-person or Family), delivery day (Wednesday through Saturday), and dietary preferences (uncheck the foods you don't eat). The 2 person plan for 3 meals per week is $59. The Family plan for 4 meals per week is $139.84 or you can do 2 meals per week for $69.92. Just like the other service you can skip any week or cancel with no penalty.

HOW IT ARRIVES: In a large box, all ingredients wrapped in a giant insulated bag with cold packs.


_ _ _ _

OUR MEALS:

Taiwanese Three Cup Chicken

with choy sum & jasmine rice


Ingredients: boneless chicken breast, jasmine rice, garlic, scallions, choy sum, thai basil, soy sauce, sesame oil, ginger, rice vinegar
Cook time: 35-45 minutes

Verdict: This was DELICIOUS, the mix of ginger, soy and sesame really give it a bold taste. This was John's favorite, he referred to it as "that yummy stuff that was as good as take out". I had never eaten choy sum as a side and it was really good and easy to prepare.

_ _ _ _

Southern-Style Shrimp & Grits

with corn, zucchini & cherry tomatoes


Ingredients: shrimp, yellow grits, scallions, garlic, corn, lemon, zucchini, cherry tomatoes, butter, cheddar cheese, smoked paprika

Cook time: 25-35 minutes


Verdict: My favorite! Completely obsessed with this one, I would never in a million years think to make this but will most definitely make it again. Unfortunately John wasn't a fan because he doesn't like shrimp but he still ate it. The best part about it is the smoked paprika seasoned shrimp, which compliments the smooth, buttery and cheesy grits.

_ _ _ _

Whole Grain Spaghetti

with corn, cherry tomatoes & mascarpone cheese


Ingredients: whole grain spaghetti, multicolored cherry tomatoes, garlic, corn, basil, mascarpone cheese, shallot, Parmesan cheese, crushed red pepper flakes

Cook time: 25-35 minutes

Verdict: Both of our least favorites but still really good. I never eat tomatoes because of the texture but I had no problem eating them in this dish. It is nice and light. The mascarpone cheese paired with the garlic make for a nice sauce.
_ _ _ _ _
Finally Opinion: We loved Blue Apron and I already ordered our second box. I like their variety of recipes (this week we get to try Thai Chicken burgers and Catfish & Freekeh!) I prefer the way HelloFresh is individually wrapped in boxes. It helps to keep it all together in your refrigerator and for newbies prevent making mistakes....which I did. I used all the garlic in the first recipe because I hadn't read that the other recipes would need cloves from it later. HelloFresh is cheaper but not by very much. We will probably use both and just pick and choose based on the recipe offerings. I plan to try a few other services as well and will report back after we try them out.

My biggest PROS for using a delivery service:
  • It has prevented us from eating out, we have been having dinner at home almost every night.
  • Opened us up to trying new types of recipes I would have never thought of
  • taught me cooking techniques I usually shy away from (ex. cutting corn off the cob instead of buying frozen or canned corn)
  • And my favorite, I get 20-40 minutes of ME time to cook. It has been a huge de-stresser but still Sawyer likes to help with some recipes and that is still just as enjoyable.

And CONS:
I really don't have cons except maybe the choices of how many meals and for how many people. It would be nice to get one for 3 people and maybe just 2 times a week.

Thursday, August 27, 2015

Meal Delivery: HelloFresh

Meal Delivery services are all the rage and for good reason. They help people, like me, who are short on time still have an opportunity to cook tasty/healthy meals without having to even step foot in a store or search for recipes. Being a new mom to two kiddos, my normal dinner routine is usually organic chicken nuggets and Annie's macaroni and cheese (trying to be somewhat healthy) so when I heard about these services, I quickly decided we would try it. We are trying both HelloFresh and Blue Apron. Here I will share our experiences in case you have been thinking about it but had questions.

This blog will cover our first HelloFresh Delivery and I will review my Blue Apron delivery next week.

HelloFresh

www.hellofresh.com (use code: F5GXE4)

HOW IT WORKS: You select meal choices the Wednesday before your delivery for the next week. You have an option of 5 meals depending on your taste and they must be entered before the deadline (midnight) or they send you the default meals for that week. You pick your delivery day of Wednesday, Thursday, or Friday and it arrives at your door step in a big box with cold packs, farm fresh ingredients and recipes. They have classic box which includes meats or a veggie box too. We choose the Classic box 3 meals per week for 2 people, cost $54 but they have a 4 person option for $114. Your first box though is only $34. You have to sign up for continued delivery but you can skip any week for no penalty or can cancel at any time. 

HOW IT ARRIVES: In a large box with cold packs individually wrapped per meal.

_ _ _ _

OUR MEALS:

Tex Mex Risotto 


Ingreditents: arborio rice, cumin, cilantro, garlic, shallot, jalapeno, corn on the cob, red bell pepper, stock concentrate, Monterrey jack cheese
Cook time: 50 min.

Vedict: Delicious. John and I both loved the flavor especially that it had a little spice but not too bad. I had never made risotto and the instructions made it easy. This was John's favorite of the three.
_ _ _ _

Chicken and Nectarine Panzanella


Ingredients: chicken breast, nectarine, demi baguette, fresh mozzarella, mint, arugula, shallot, white wine vinegar, and zucchini
Cook time: 35 min.

Verdict: I ha never heard of Panzanella but this was my favorite of the three! The mix of mint and vinegar in dressing was perfect, the warm tender chicken and cruncy home-made croutons on top were the icing on the cake. Deceivingly filling!

_ _ _ _

Crispy Skillet Chicken


Ingredients: chicken, cracked Bulgar, carrot, zucchini, parsley, lemon, stock concentrate, dried apricots and shallot
Cook time: 40 min.
Verdict: Good but our least favorite. The Bulgar and veggies were yummy but we had trouble getting the chicken cooked completely with the suggested cook time. I ended up cooking it for an extra 20 minutes but that made it less juicy. I wouldn't make this again.
_ _ _ _ _
Finally Opinion: We will definitely be ordering HelloFresh again. Was very pleased with the 
way it was delivered and how helpful the instructions were. We had one item arrive different that was indicated (fresh mozzarella actually came as packaged) and I emailed their Help Desk and they credited my account for the mistake.

Tuesday, March 18, 2014

Kitchen Experiements: Kale Chips

Yummy!!
Fine, I'll admit it...I'm on a total kale kick. It is perfect to hide in foods for my little guy so he still gets his veggies. Plus, its nutritional facts are awesome. The most impressive fact I found was that per calorie, Kale has more Iron than beef (more benefits of eating kale). Alternate sources of iron is super important for my family since I don't eat red meat which spills over to the things I cook for Sawyer and John.
This week I decided to try Kale Chips and they are Oh My Word delicious, addictive and the best snack. I know I am a pretty adventurous eater so maybe I am over-hyping but I recommend trying them for a healthy snack. They remind me of flash fried spinach. I know they have to be good because John LOVED them...almost ate the whole bag. Sawyer hasn't tried them yet, he has issues with the way they look since it still looks like grass...

KALE CHIPS

INGREDIENTS


  • 1 bunch kale (I use curly kale)
  • Olive Oil (extra virgin oil oil)
  • sea salt
  • lemon juice - I added this for my flavor preference but feel free to leave out or use Parmesan


DIRECTIONS

1. Preheat oven to 300 degrees
2. Wash Kale completely
3. dry completely. I laid mine out on paper towels in stacks and let sit for an hour
dry completely!
4. cut off stems and cut into desired size for chips
5. In a freezer bag, I added a bunch of the dried, cleaned kale and poured in olive oil and lemon juice, toss until all leaves are completely covered. May have to do a few time to get the whole bunch
Toss to cover all leaves
6. After Kale is covered in oil/lemon juice mix, lay out on nonstick baking sheets and dust with sea salt (as desired). I had to use 2 sheets for the whole bunch
7. Bake for 8-12 minutes, they cook fast so check often. Do not let them burn! As soon as they look rigid and crisp, take them out. I took mine out at 8 minutes and they were perfect.
Crispy and reading to snack

Enjoy!

Wednesday, January 22, 2014

Ooh I like that: Kale Smoothie

Jokes on you Sawyer!
I am always trying to think of ways to incorporate veggies in an indiscreet way for Sawyer. He is going through a phase of judging food by its cover (lettuce looks like grass so it is yucky!) I decided to invent my own kale smoothie with some high nutrient dense ingredients to see if he would like it and to my surprise, he did. Looks like I was able to pull a fast one on our smart little guy so he can still get the fruits and vegetables he needs, score!
It may not look pretty but you could always add more blueberries to hide the green.

INGREDIENTS
(for 1 smoothie)
1 cup Baby Kale (cleaned, de-stemmed)
1 banana
1 cup blueberries
1 cup shredded carrots
1 cup milk/almond milk/soy milk (your choice)

Looks so pretty!

DIRECTIONS
- put all ingredients in a blender and blend, easy peezy!

Enjoy!

Tuesday, July 2, 2013

Kitchen Experiments: Crescent Roll Chicken Enchiladas


Our family loves anything that involves cheese and bread so when I found this yummy recipe while scouring the web for dinner ideas, I knew it would be a hit. It is like little pockets of cheesy/chicken goodness. It is super easy to put together, I made them in about 10 minutes.

I did change it up a bit on a couple things. I added our new favorite cheese (Velveeta Shreds Queso Blanco, yum!) and spinach. I have been trying to incorporate hidden veggies in our meals for Mr. Sawyer, he didn't even notice the spinach. I also did 2 cans of crescent rolls instead of one (luckily I had an extra) because the filling made way more than enough for just one package. We had ours with some Skinny Girl Sangria and it was a delicious meal, Sawyer had milk of course.
Thanks OhBiteIt.com for the idea!

INGREDIENTS

2 Container (8ct.) Pillsbury Crescent Rolls
3/4 Cup Milk
1 Cup Shredded Cheddar Cheese (Fiesta Blend)
1 Cup Velveeta Shreds  Queso Blanco
1 Can of Chicken Breast
1 Can of Cream Of Chicken Soup
1 Can of Chopped & drained Green Chiles.
1/2 Can Chopped & drained Spinach

STEPS

  1. In a medium bowl combine the chicken and 1 cup of the Cheese ( I mixed the two kinds). Break up the chicken and incorporate the cheese with a fork. Set aside.
  2. In another medium bowl mix together the Soup, Milk, Green Chile and Spinach. Set aside.
  3. Lay out the 2 containers of Crescents and add about a tbsp. of the Chicken mixture to the wide end and roll it up.
  4. Spread a small scoop of the Gravy mixture into the bottom of the casserole dish and place the filled and rolled Crescents in.
  5. Pour the remaining gravy over the top of the Crescents, making sure to cover them completely.
  6. Sprinkle the top with the remaining Cheese.
  7. Bake it uncovered at 350 for approx. 25 minutes.
If you can tell he is saying "Emmm!"
Perfect mix!


Thursday, June 27, 2013

Kitchen Experiments: Peanut Butter No-Bake Bars

Yep, here's another peanut butter recipe. I just can't help my self, no baking + peanut butter, how could I not share?

Peanut Butter No-Bake Bars


Ingredients

1 cup salted butter (melted)
2 cups graham cracker crumbs
1/4 cup brown sugar
1 3/4 cup powdered sugar
1 cup peanut butter
1/2 tsp. vanilla
1 (11 oz) bag milk chocolate chips

Steps

  1.  Combine all ingredients, except chocolate chips in a medium sized bowl.
  2. Stir until the mixture is smooth and creamy.
  3. Pour peanut butter mixture into a 9x13 pan. 
  4. Melt chocolate chips in the microwave (at 50% power) for 1-2 minutes.
  5.  Stir chocolate and pour over the peanut butter mixture.
  6. Spread chocolate with a spatula. To even out chocolate, tap pan on the counter. 
  7. Refrigerate bars for one hour. Cut while bars are still cool.
  8. Enjoy!

Friday, January 18, 2013

Kitchen Experiments: Cinnamon Sugar Dipped Blueberry Muffins


My husband loves muffins, especially blueberry muffins. I have never attempted to make homemade muffins, only the store bought packages. While not comparable taste-wise, I thought it would be too much work to attempt home-made. A friend at work brought in these a couple weeks ago and just by looking at them I could tell I wanted the recipe even if it was going to be more work. They had a delicious topcoat of cinnamon sugar and he even swore the recipe was easy.  He was right and they turned out delicious (thanks Kyle)! By they way, John approved and I got to use my new mixing bowls that the Johnson’s got us for Christmas. I love them!

 Cinnamon Sugar Dipped Blueberry Muffins

INGREDIENTS

2 cups unbleached all-purpose flour (10 ounces)
1 tablespoon baking powder
½ teaspoon table salt
1 large egg
1 cup granulated sugar (7 ounces)
4 tablespoons unsalted butter, melted and cooled slightly
1 ¼ cups sour cream (10 ounces)
1 ½ cups frozen blueberries
½ cup granulated sugar
½ teaspoon ground cinnamon
4 tablespoons unsalted butter

STEPS

  1. Adjust oven rack to medium position and heat to 350 degrees.
  2. Spray standard muffin tin with nonstick vegetable spray and set aside.
  3. Whisk flour, baking powder and salt in medium bowl until well combined. Set aside.
  4. Whisk egg in a second medium bowl until well combined and light-colored (about 20 seconds).
  5. Add sugar and whisk with egg vigorously until thick and homogeneous (about 30 seconds).
  6. Add melted butter in 2-3 steps, whisking to combine after each addition.
  7. Add sour cream in 2 steps, whisking just to combine.
  8. Add frozen berries to dry ingredients and gently toss to combine.
  9. Add sour cream mixture and fold with rubber spatula until batter comes together and berries are evenly distributed (25-30 seconds). Do not over mix, batter will be thick and some flour spots may remain.
  10. Use a spoon or ice cream scoop to drop batter into greased muffin tin.
  11. Bake until light golden brown (25-30 minutes).  Rotate pan about half way through. Test by putting a tooth pick in center of muffin and if it comes out clean it is done.
  12. Invert muffins onto wire rack and let cool completely
  13. While muffins are cooling, mix sugar and ground cinnamon in small bowl and melt butter in a small saucepan.
  14. Take cooled muffins and dip top in butter and then in cinnamon/sugar mixture.
  15. Serve!

Friday, January 11, 2013

Kitchen Experiments: Cheesy Ranch Chicken Chili


I'm a little bit obsessed (okay maybe a lot) with Chicken Chili recipes and when I see variations I have to try them (see Previous Chili recipe here: http://johnkarihamra.blogspot.com/2011/09/kitchen-experiments-white-bean-chicken.html)
I actually made this a few weeks back for the Dexter Season Finale with the Johnson's but forgot to post it. It is very savory & cheesy plus there is ranch involved, what's not to love? My mom tried it with turkey last week and it was also delicious.

Cheesy Ranch White Chicken


INGREDIENTS
·      2 TBSP butter
·      2 TBSP Extra Virgin Olive Oil
·      3 Boneless, Skinless Chicken Breasts, cut into bite sized pieces, salt and peppered
·      1 medium Yellow Onion, diced
·      2 cloves Garlic, finely minced
·      2 cups Chicken Broth
·      3 cans (15 ounces) Cannellini Beans drained and rinsed.  They can also be called white Kidney Beans
·      2 cans (4 ounces) diced Green Chilies
·      1 tsp Salt
·      1 1/2 tsp Cumin
·      1 tsp dried Oregano
·      1/2 tsp Black Pepper
·      1/4 tsp Cayenne Pepper
·      1 packet (1 ounce) dry Ranch Dressing Mix
·      1 cup shredded Monterey Jack Cheese, plus more for garnish if desired
·      1 cup Sour Cream
·      1/2 cup Whipping Cream
·      1 TBSP chopped fresh Cilantro

Step 2

STEPS
  1. In a skillet over medium high heat, melt butter in olive oil and brown pieces of chicken in 2 batches. 
  2. Once all chicken is cooked, set aside and lower heat to medium - medium low. 
  3. Sauté onions until soft and translucent, about 2-3 minutes. 
  4. Add garlic and allow to cook slightly.  Make sure to check often, burnt garlic is pretty gross!
  5. Transfer onions and garlic to a pot and add chicken. 
  6. Add in the chicken broth, beans, green chilies, Ranch packet, and seasonings and bring to a boil. 
  7. Reduce heat to low and allow to simmer for 30 minutes. 
  8. Turn heat off and add in the shredded cheese, sour cream, heavy cream, and cilantro and stir to combine. 
  9. I served with oyster crackers and more cheese, yum!

Monday, December 3, 2012

Kitchen Experiments: Nutter Butter Truffles, White Chocolate Topped Gingerbread and Peppermint Platter


John's new favorite thing I have made

This past Saturday, my mother and I were invited to a Holiday Cookie/Ornament exchange. We were both super excited to try out some new recipes. We decided to get together to make the cookies and she even had the idea to make a peppermint platter to bring them on. So this is a 3-recipes-in-one blog of Nutter Butter Truffles, White Chocolate topped Gingerbread Cookies all served on a Peppermint Platter. Enjoy!


Nutter Butter Truffles
Ingredients
1 package Nutter Butters
1 package (8 oz) cream cheese, softened
White chocolate bark or discs for melting & drizzling
Peanut Butter for drizzling


Steps
  1. Crush up the whole package of Nutter Butters, I used my Kitchen Aid mixer. Make sure to put the splashguard on so cookies don’t go everywhere.
  2. Add softened package of cream cheese and mix well.
  3. With hands, form into balls (about the size of ping pong balls). Refrigerate on wax paper on a large platter or cookie sheet.
  4. Melt white chocolate in the microwave, stirring until smooth.
  5. Remove balls from refrigerator and with a toothpick or skewer (I found these easier to use); dip in melted chocolate covering completely. Let cool on wax paper
  6. Melt a little of white chocolate with peanut butter in a bowl. Use a spoon to drizzle the mixture on top of the truffles.
  7. Store in the refrigerator.

White Chocolate Topped Gingerbread Cookies


Ingredients
3 cups flour

2 tsp. Ginger, Ground

1 tsp. Cinnamon, Ground

1 tsp. baking soda

1/4 tsp. Nutmeg, Ground

1/4 tap salt

3/4 cup (1 1/2 sticks) unsalted butter, at room temperature

3/4 cup firmly packed brown sugar

1/2-cup molasses

1 egg

1/4 cup granulated sugar

1 tsp. Vanilla Extract

8 oz white chocolate, cut into small chunks

Steps
  1. Mix flour, ginger, cinnamon, baking soda, nutmeg and salt in large bowl.
  2. In a separate bowl, beat butter and brown sugar with electric mixer on medium speed until light and fluffy. Add molasses, egg and vanilla and beat well.
  3. Gradually beat in flour mixture on low speed until well mixed.
  4. Press dough into a thick flat disk. Wrap in plastic wrap. Refrigerate 4 hours or overnight.
  5. Preheat oven to 350°F.
  6. Shape dough into 1-inch balls and roll in granulated sugar.
  7. Place 2 inches apart on ungreased baking sheets.
  8. Bake 8 to 10 minutes or until edges of cookies just begin to brown.
  9. Immediately press a chunk of white chocolate into the center of each cookie.
  10.  Leave on the cookie sheet until the chocolate begins to melt.
  11.  Use the back of a spoon to swirl it into a little chocolate puddle.
  12.  Remove cookies to wire racks; cool completely.
  13. Store cookies in airtight container up to 5 days.

Serve on your DIY Peppermint Platter:


What you’ll need
Peppermints (can use whatever color you like)
Cookie sheet
Parchment paper


Steps
  1. Heat oven to 350 degrees
  2. Place parchment paper on cookie sheet (round or square)
  3. Unwrap candies (there will be a lot!)
  4. Arrange mints in any design you wish on top of parchment paper on a cookie sheet leaving room on the sides.
  5. Bake for approximately 8-10 minutes
  6. Take out and allow to cool on cookie sheet (about 5 minutes)
  7. Remove wax paper from bottom. Be careful, tray is stronger than you might think but still is breakable.